
Node.js
Unit: 3 of 15
In one of the previous lessons, the notion of isomorphic or universal applications was mentioned. Creating isomorphic JavaScript applications became possible with the Node.js runtime environment. It created the conditions for JavaScript to go beyond the web browser and find its place on the server.
What we are particularly interested in in this course is the application of the Node.js runtime when it comes to front-end development. Namely, although it is primarily intended for executing JavaScript logic on the server, Node.js has completely changed the way modern JavaScript applications are built. Thus, Node.js and its package manager (npm) have become indispensable tools in the arsenal of front-end programmers.
In this lesson we will first show you how to install the Node.js runtime and package manager (npm). After that, the basic elements of using such tools will be presented, which will lay the foundations for their use in the lessons that follow.
What is Node.js?
Node.js is an open-source JavaScript runtime environment that allows JavaScript to be executed outside of a web browser. It is based on the V8 JavaScript Executable Environment of the Chrome web browser. Node.js is mainly used:
- for the execution of JavaScript code on the server and
- for the execution of tools that facilitate and accelerate front-end development.
Node.js represents a form of realization of the JavaScript everywhere paradigm , which aims to achieve web development, which involves the use of a single programming language on the client and on the server.
Node.js is the executable environment that ensures the execution of the language program code:
Installing Node.js
Before you can take advantage of the Node.js runtime, it must be installed. Node.js is available for all relevant platforms and the necessary installation file can be downloaded from the following address:
https://nodejs.org/en/download/
On the download page of the Node.js environment, you must select the variant that corresponds to the characteristics of your operating system (image 3.1.).

Image 3.1. Node.js installation page
The downloaded installation file must be run and the instructions must be followed (image 3.2.).
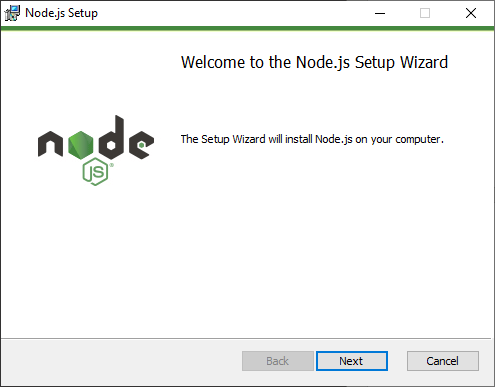
Image 3.2. The first step in the Node.js installation process
The first few steps in setting up the installation are typical and common (images 3.3. and 3.4.).
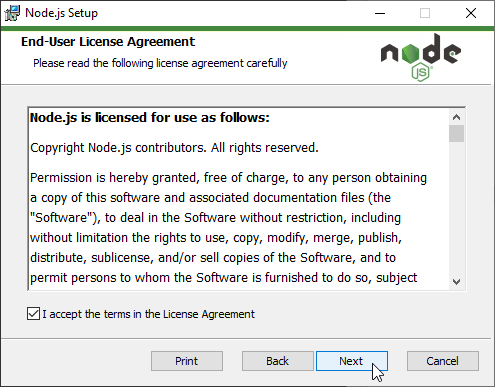
Image 3.3. Acceptance of license terms
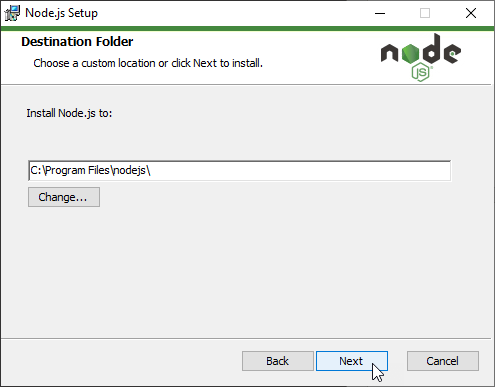
Image 3.4. Defining the installation path
A very important segment of the Node.js installation refers to the possibility of installing the Node.js package manager (abbreviated npm) and setting the installation path in the Path system variable (image 3.5.).

Image 3.5. Choosing the functionalities to be installed
Node.js is installed by default with the package manager, and during installation, the path is set to the Path system variable. You can also see this in image 3.5., where, on the left side of the window, a list of all the things that can be done during the installation of Node.js is displayed. At this point, we don’t need to change the default settings in any way, because we will need the package manager later in the lesson.
The next installation step concerns the installation of certain tools that allow the use of Node.js modules written using the C/C++ language. Since such modules must be compiled in order to be used, we must have appropriate tools to do the compilation, and the Node.js installation window only allows us to install such tools at this time (image 3.6.).
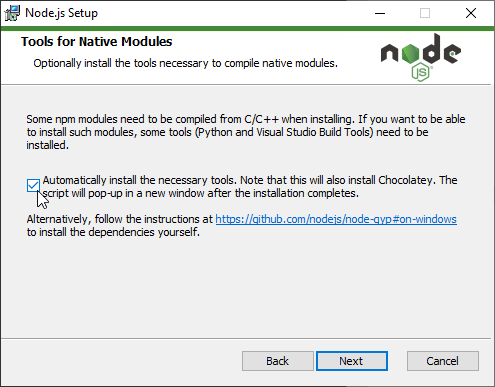
Image 3.6. Option to install additional tools for compiling Node.js modules written with C/C++ languages
Since we will not cover Node.js in detail in this course, as it is beyond our scope at this time, you may, but not necessarily, have these tools installed. In any case, you can always install the build tools later.
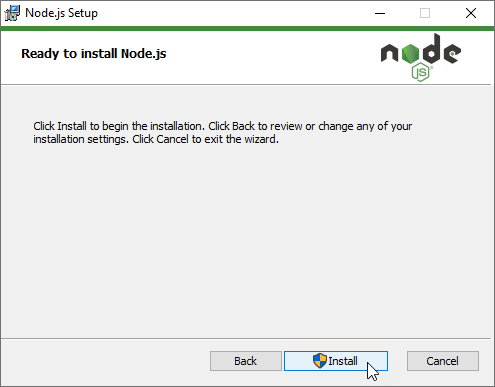
Image 3.7. Running the Node.js installation
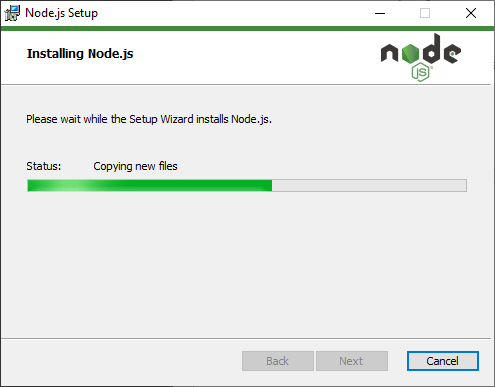
Image 3.8. Installing Node.js
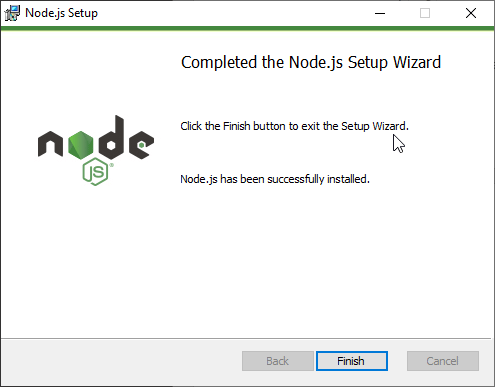
Image 3.9. Successful completion of Node.js installation
Checking the installation
To ensure that Node.js installation was successful, open the console (Command Prompt or PowerShell on Windows operating systems) or terminal on MacOS and run the following command:
node -v
This command can be run from any path because it was automatically placed inside the Path system variable earlier during the installation of the path where Node.js is installed.

Image 3.10. Checking the availability of Node.js using Command Prompt on Windows operating system
The differences between Node.js and the web browser
Before we move on to writing the first JavaScript code that will run the Node.js runtime, we need to understand the basic difference between running JavaScript code within a web browser and the Node.js runtime.
Although both environments understand JavaScript, writing front-end logic is significantly different from writing code that is executed on a server via Node.js. To begin with, you need to understand that Node.js does not have different Web APIs that web browsers expose to use JavaScript code placed on the front end. Therefore, when working with Node.js, there is no DOM, Location, History, Cookie and other APIs that are specific to web browsers. If you think about it, this is to be expected, given that Node.js is primarily built to enable the execution of JavaScript code on the server, and the focus of server logic is not code that handles with presentation logic.
On the other hand, Node.js understands all JavaScript language elements that can be used when writing front-end code: expressions, types, variables, functions, loops, strings, literals, Promises, Closures, etc… Given that is based on the most popular executable environment used by most modern web browsers, new language functionalities, defined by the ECMAScript specification , are regularly implemented within Node.js.
Another significant difference between Node.js and a web browser concerns the way Node.js handles modules . Since for a long time the JavaScript language did not have an original way of creating and managing modules, such functionality was implemented in Node.js using the CommonJS library. Meanwhile, the term module was originally included in the JavaScript language, but Node.js still uses the CommonJS module.
Using Node.js using the console
An integral part of Node.js is a command tool that allows you to manage the executable environment using a console or terminal. Such a tool reflects on the node executable file, whose path during installation is located in the Path variable system, and therefore we can use it by simply typing the word node inside the console. The node tool allows the execution of code that is inside a .js file, but also the execution of code that is passed directly to the node command tool.
By typing the command node in the console or terminal, we enter a special mode of using Node.js, called REPL ( Read – Eval – Print – Loop ). This is a mode that can be used to write simple JavaScript commands and thus test the executable environment (image 3.11.).

Image 3.11. Enabling REPL mode
In image 3.11. you can see enabling console mode which allows writing JavaScript code directly. Therefore, it is now possible to do something like in images 3.12. and 3.13.

Image 3.12. Example of direct execution of JavaScript code in the console (1)
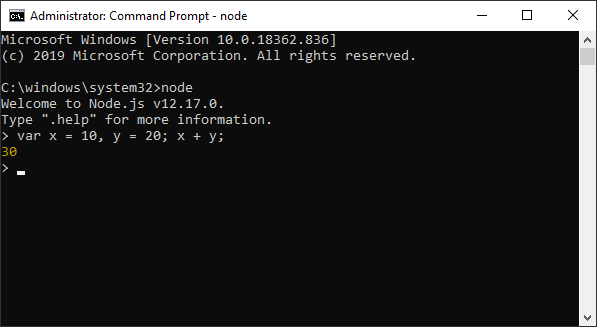
Image 3.13. Example of direct execution of JavaScript code in the console (2)
| Note
REPL mode can be exited using the .exit command. |
The node command can also be used to execute JavaScript code that is stored in a .js file. For example, here’s what the contents of a JavaScript file might look like:
var x = 10;
var y = 20;
console.log(x*y);
If such code is located in a file called test.js in the C:/node_js folder , it can be executed using the Node.js executable, as in Figure 3.14.

Image 3.14. Execution of the JavaScript code defined within the file
| The Console object
From the example shown, you can see that the Node.js runtime also allows you to list messages in the console just like in a web browser. However, in web browsers, the console is a property of the global Window object, and previously I said that the Window object does not exist in Node.js. Where then do we have the possibility to use the Console type object? The Console type object can be used because the Node.js executable also has such an object, with a similar set of functionalities, as the object of the same name in the web browser. In Node.js, Console is a global object, so that’s why we were able to use it in the way shown in the previous example. As mentioned, the Console object in Node.js has a similar set of functionalities to the object of the same name in the web browser:
|
Creating the first HTTP server in Node.js
Certainly, the most popular form of using the Node.js executable environment is the possibility of writing server logic using JavaScript. The basic code format, which will create an HTTP server using the Node.js runtime, looks like this:
|
1
2
3
4
5
6
7
8
9
10
11
12
|
const http = require('http');const port = 3000;const hostname = '127.0.0.1';const server = http.createServer((req, res) => { //handle received request...})server.listen(port, hostname, () => { console.log(`Server running at ${hostname}:${port}`)}) |
Creating a Node.js HTTP server starts by calling a special function require() , which includes a Node.js module in the current document.
| Node.js modules
The functionalities of the Node.js executable environment are divided into modules. Modules allow functional, logical and physical grouping and organization. Also, each Node.js module is a unique namespace, so ultimately modules prevent conflicts due to using identical identifiers. The core Node.js functionalities are divided into several modules:
None of the above modules are included by default in an application running on the Node.js executable. Therefore, each of the modules whose functionalities we need must be included in the document in which they will be used. The module is activated using the require() function , which has the following form: var module = require(‘module_name’); The require() function is passed the name of the module, and as a return value it emits a simple value or an object defined as the return value of the module. |
In the example just presented, of creating an HTTP server using Node.js, the http module is enabled . By activating the http module, an object of type Server is obtained , which is then used to create and start the server.
The server is first created using the createServer() method . During server creation, the createServer() method is passed a callback function . It is a function that will be activated upon receipt of each request. Such a return function accepts two parameters, i.e. two objects:
- req – the object by which the request is represented,
- res – the object that represents the response that will be sent to the client.
The createServer() method does not start the server, but calls the listen() method on the server instance. The listen() method accepts three parameters:
- the port on which the HTTP server will listen for client requests; in the example, the port is defined using the variable of the same name, with the value 3000 ,
- the name of the host through which the server will be available; in the example, the host name is defined by the hostname variable , with the value 127.0.0.1 ; In this way, the hostname is set to the local IP address,
- the callback function that will be activated when the server is ready.
The server creation code just presented does not have logic to create the server response. Here’s what the code for creating a simple response might look like:
|
1
2
3
4
5
6
7
8
9
10
11
12
13
14
15
16
|
const http = require('http');const hostname = '127.0.0.1';const port = 3000;const server = http.createServer((req, res) => { res.statusCode = 200; res.setHeader('Content-Type', 'text/html'); res.end('<h1>Hello World</h1>');})server.listen(port, hostname, () => { console.log(`Server running at ${hostname}:${port}`)}) |
Now, within the callback function, which is activated during the reception of HTTP requests, the logic by which the HTTP response is formed is established. To perform such an operation, an object is used whose reference is in another parameter that such a callback function accepts. The defined logic forms a very simple HTTP response:
- through the statusCode property , the status code of the response is set to the value 200,
- the setHeader() method defines the Content-Type header , which defines the type of content delivered in the response body,
- the end() method defines the body content of the HTTP response.
Starting the Node.js server and sending the first request
The newly created HTTP server can be started using the node command from the console or terminal. Of course, you need to navigate to the folder containing the JavaScript file just presented, then run the command:
node server.js
Starting the Node.js server is illustrated in Figure 3.15.
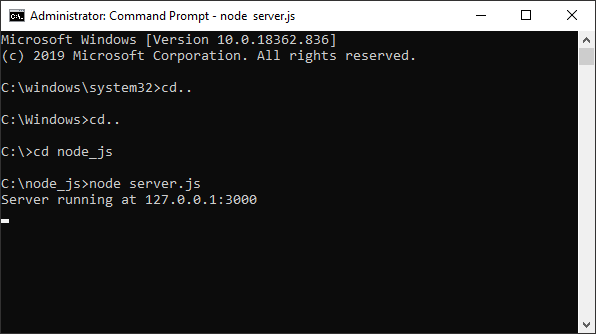
Image 3.15. Starting the Node.js server
After starting the server, you can open a web browser and send a request to the server you just created, specifying the address localhost and port 3000:
The appearance of the page obtained from the Node.js server is illustrated in image 3.16.

Image 3.16. The page displayed in the browser, obtained from the Node.js server
| Note
Attention, the Node.js server is active as long as the console or terminal window is open. When such a window is closed, the created Node.js server is also destroyed. |
npm
At the beginning of this lesson, I said that an integral part of Node.js is also a special package manager – npm (English Node.js Package Manager ). Over time, it has managed to establish itself as the absolute standard when it comes to repositories that allow automatic dependency resolution when using the JavaScript language.
| What are package managers?
npm is one of the specialized programs, called package managers. These are programs used in the programming world for easy dependency management. Dependencies are all those external functionalities that an application needs to function. For example, the dependencies of a web application can be jQuery, Vue, Modaal, Moment, React, Lodash… In addition to the listed dependencies, which are actually JavaScript libraries, following the development of websites, the dependencies can also refer to different styling libraries – Bootstrap, Font Awesome, Material UI, Normalize… Package managers allow automatic manipulation of the libraries and software frameworks used by an application. In this way, they effectively free the programmer from the need to independently find, download and activate libraries and take care of their subsequent updating. To be able to take care of various dependencies automatically, package managers rely on another very important concept from the story of automatic background dependency management. It’s about repositories. The repository is a digital (online) database where various software libraries are stored. Each platform has its own package managers and repositories. Maven and Gradle are used in the world of Java programming, Composer is used when working with the PHP language, and pip and pypi are used when using the Python language. When it comes to the JavaScript language, npm is the absolute standard. |
npm is actually a term that implies:
- repository – a database where information and program code of the package are stored,
- client application – an application that is installed on client devices and is used for package management (this is an executable file, called npm , which during installation is located in the Path system variable),
- website ( npmjs.com ) – using this website it is possible to search for packages located in the repository.
It is important to say that npm is the repository with the world’s most libraries of a language. More than 400,000 libraries dedicated to JavaScript programming are located in the npm repository.
Also, npm is actually a JavaScript application, which is executed through the Node.js executable.
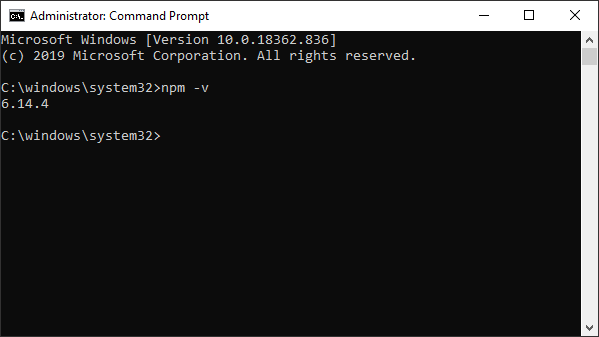
| npm availability check
As you could see at the beginning of this lesson, npm is automatically installed by default along with the Node.js runtime. However, to check if npm is installed on your operating system, simply enter the following command in the console or terminal: npm -v If the npm package manager is available, you will get a listing like in image 3.17.
Image 3.17. The command to check for npm availability In image 3.17. we can see that npm is installed and ready to use. |
Installing the package using npm
By now, you may have noticed on the websites of various JavaScript libraries that almost every library, in addition to the traditional way of integration, which relies on downloading files and manually placing them in a certain path within the project, allows integration using the npm package manager . For example, to integrate the jQuery library using npm, it is enough to issue the following command:
npm install jquery
Before running the given command inside the console or terminal, it is important to know that you must be positioned in the root folder of the project where you want to integrate the defined library (image 3.18.).
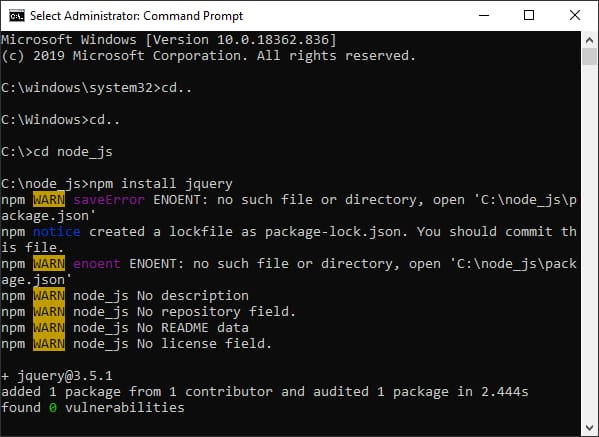
Image 3.18. Downloading the jQuery library using npm
File structure of the npm package
The way npm integrates packages into a project differs from the classic approach, which involves downloading files and manually placing them in the project structure. Therefore, packages that are integrated into a project using npm, are placed in a special folder called node_modules (image 3.19.).
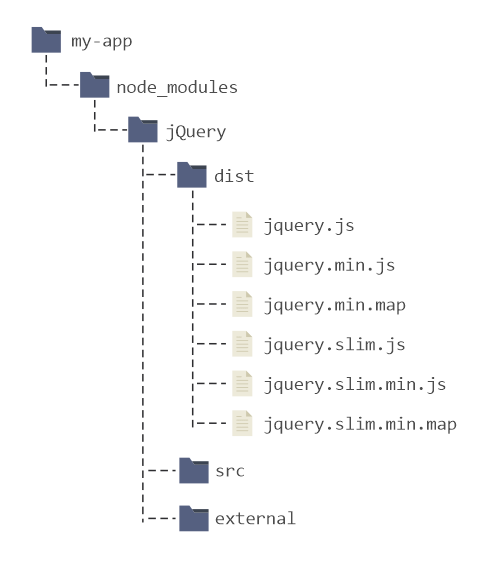
Image 3.19. Simplified project structure after integrating the jQuery library using npm
In image 3.19. you can see that npm, when integrating the first package, created a new folder, called node_modules , in the root folder of the project. This is the folder where downloaded packages are stored. Each package is placed in a separate folder named after the package.
Another difference compared to traditional integration refers to the structure of the dependencies that are integrated. In image 3.19. you can see that the jQuery library is represented by using several different folders: src, dist, external … In other words, by integrating a package using npm, in addition to the files that will be used in the HTML documents, the source code of the library is downloaded , but also any dependencies and external libraries that might be needed to use the downloaded package.
The structure of folders and files in a package can vary from package to package, however, there will almost always be the following folders:
- src or source – the folder with the source code of the package,
- dist – the folder with files that are ready for use, i.e. for integration into another project.
The package.json file
So far, you’ve only seen one obvious advantage of using npm, which is a very easy way to download packages. Another very useful feature of npm projects is reflected in the ability to define a special file – package.json .
The package.json file is used to describe an npm package and is usually located in the root folder of the package it describes. For example, if you look in the root folder of the previously downloaded jQuery library, you will be able to find the package.json file mentioned.
In addition to package information, the package.json file allows for the precise definition of all project dependencies, which ultimately allows the npm package manager to manage them automatically.
A great thing is that we can also use the benefits of the package.json file for projects that we create independently. The easiest way to define a package.json file for a project is to use the npm init command :
npm init
Running this command initializes a series of questions that must be answered. Based on the response, npm will form the contents of the package.json file . An example of a simple package.json file for the project in this lesson might look like this:
|
1
2
3
4
5
6
7
8
9
10
11
12
|
{ "name": "my-app", "version": "1.0.0", "description": "This is my demo app", "main": "server.js", "dependencies": { "jquery": "^3.5.1" }, "devDependencies": {}, "author": "Vladimir Dresevic", "license": "ISC"} |
A particularly important section in the package.json file is the one marked with the dependencies key . All the dependencies of our project are kept in this property of the JSON object. The existence of such a file, which describes the complete project, together with a list of all dependencies, allows the simultaneous download of all dependencies, by defining the following command:
npm install
This approach simplifies code sharing and teamwork, as anyone with a package.json file can create a complete dependency structure using a single command. Also, npm will pick up all the dependencies defined in the dependencies section of the package.json file when you run the install command .
Node.js, npm and front-end development
Right now, when it comes to front-end development, we’re particularly interested in the usability value of the Node.js executive environment and package managers. So far, you’ve seen how npm simplifies the process of downloading and installing JavaScript libraries within the project we’re working on. However, we have not yet seen what advantages this can bring us during front-end development, namely how to integrate the downloaded packages into the HTML documents that represent the presentation of our JavaScript applications.
What you could see in the previous lines, is that npm stores the downloaded packages in a special folder named node_modules . You may rightly ask why npm performs package integration in this way, and not in the way that is also used during manual integration. Don’t forget that npm is primarily a package manager for Node.js, whose main focus is running JavaScript code on the server. Therefore, the npm package structure is adapted to use this in Node.js applications. Therefore, when developing Node.js applications (applications that will run the Node.js executable), once installed, the package can be easily included in the project by calling the require() functionalready seen (previously featured as a tool for enabling Node.js module basics).
Since we’ll be using npm packages for front-end development (ie writing applications that run in a web browser) later in this course, we can’t rely on the require() function mentioned for integrating downloaded files . The easiest way to integrate the downloaded files is to manually find the necessary files in the generated file structure and place the link code in the HTML document (or in several documents). E.g:
<script src=”node_modules\jquery\dist\jquery.js”></script>
Using the line of HTML code just shown, you can integrate the jQuery package, which was previously downloaded using npm.
Given a somewhat more complicated way of integrating downloaded files using the npm package manager, over time, numerous tools have been developed that, among other things, can be used to automate such a process. These tools are written using the JavaScript language and are executed by the Node.js executable environment. Thus, Node.js and npm have effectively become indispensable tools that are also used during front-end development. For example, to perform automatic integration of downloaded npm packages when an application is built to run in a web browser, various project development tools are available to developers. Some of the most well-known tools of this type are Browserify and Webpack. These are tools that, through the Node.js executable environment, can transform the code of an npm project, that is, they can automatically create files that are ready for use in a web browser. Thus, they represent a powerful alternative to the presented approach, which involves manually including the downloaded libraries by specifying the paths where they are located in thenode_modules.
Node.js and npm are the basis of the operation of various tools that facilitate and accelerate the creation of front-end logic when using various libraries or software frameworks intended for front-end development. Therefore, Node.js and npm will be used later in this course when you learn more about the Vue, React, and Angular software frameworks. So, all the listed software frameworks, intended for front-end programming, also have appropriate command interfaces (CLI – Command Line Interface) that facilitate development and automate some common operations when creating JavaScript applications.