
Node.js
Unit: 13 of 19
In this lesson we will familiarize ourselves with the basic concepts of the Node.js platform. Node.js is a server-side JavaScript platform that consists of a special library. It serves to create fast and scalable web applications. This platform is based on events and actions. JavaScript is popular on the client side and can also be executed on the server using the Node.js platform.
| Note: Node.js is based on Google Chrome ‘s V8 JavaScript engine . |
In the previous lessons we met with AJAX, where we saw how we can access the content of a particular page asynchronously. On the Node.js platform, functions execute asynchronously. Installing the Node platform is not complicated; for Windows it is enough to download an installer and follow the installation instructions. You can download this installer from http://nodejs.org/ :
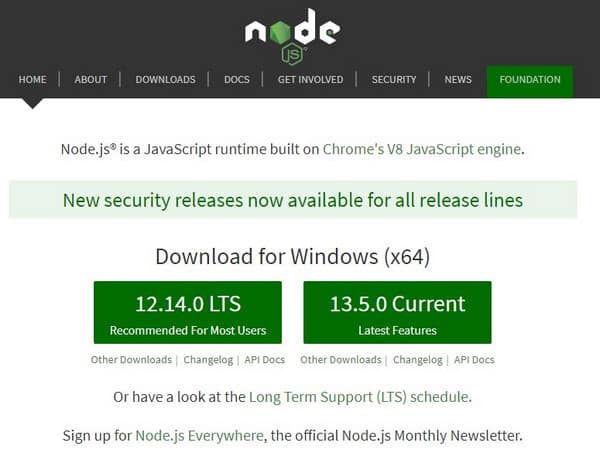
Image 13.1. Downloading Node.js
These installers are also provided for other platforms, which can be found at: https://nodejs.org/en/download/ :
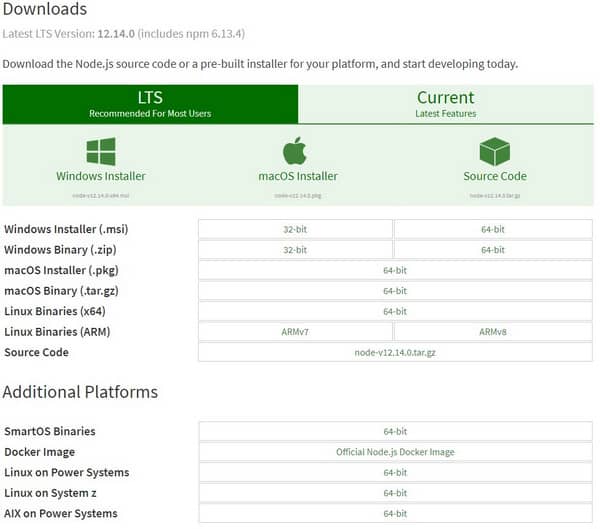
Figure 13.2 Download page
Once you’ve downloaded the installer, run it and select Next. The installation itself does not require any additional settings and it is enough to complete the installation of Node.js with a few clicks on the Next button within the installation.
Running the Node.js application
After installation, start your Node.js application . You should get a console window similar to:
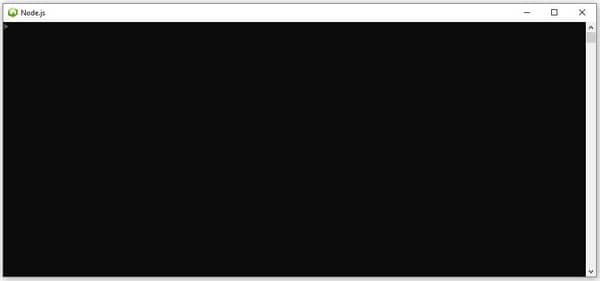
Image 13.3. Running the Node.js application
In this window you can enter the JavaScript code. First, we’ll test the Node.js platform by running the command:
|
1
|
console.log("This is Node application."); |
If you have successfully installed the Node.js platform, you will get the following in the Node.js console:
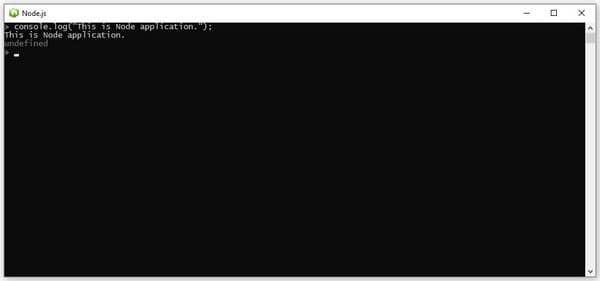
Image 13.4. Node.js console layout
The console always displays the type of the return value, which in this case is undefined.
One of the great advantages of Node.js is its simplicity. Unlike PHP or ASP, there is no clear separation between web server and code, and also no major environment settings to get the desired content. With the Node.js platform, we can create a server, execute its configuration, and present the content using code.
| Note: Node runs successfully on Unix-compatible systems and, more recently, on Windows systems. |
In the Node.js platform, the concept of module is of great importance. Modules are a set of JavaScript code segments that can be contained within the Node.js platform. Modules can be used within the application. The first thing you need to do when creating a web application is to call the modules that need to be included in the application. The list of modules you can use is at https://npmjs.com/package/package-list. Here you can see all the available modules offered by the Node.js platform and what you can create with them. In the example we will use the Jade template engine. Jade has a special syntax that is implemented with JavaScript code and adapted to the Node.js platform. To be able to use this module, we need to install it. When installed on the computer, Node.js automatically installs some default modules, but most of them are not included in the package, so it is necessary to install them later. We can install Jade by placing it on any computer location in the console and then typing the following command in the console:
|
1
|
npm install jade |
After running this command on the location where you were positioned within the console, the node_modules folder will be created. In our example we called the commands from the C: \wamp\www folder, so the modules will be installed here. Within this folder is created the Jade module , which is now available for us to use within the application. Now, we need to create the application where it will be used. On the same location, create a new file with an arbitrary title. This file must of course have the extension js. So this file will contain some JavaScript code. Let’s see the example:
|
1
2
3
4
5
6
|
var jade = require('jade');options = {filename:"jade_example",self:"true"};locals = "";var result = jade.compile('div jade', options);var html = result(locals);console.log(html); |
First, we need to call the require() function and pass the name of the module we need. In this way, all the functions and variables that the module has become available to us. We call the jade compile() function , which is responsible for compiling the code and providing a certain result. Before that, we also need to define the options that are passed for compilation. These options are generally filename, include debug, etc. In the example, we have defined 2 attributes within the options. The filename and the self attribute , which are used to define the namespaces that will store the locals variables . Finally, we define the console.log() command, with which we write the contents of the page to the console. If you successfully created the previous file, you need to position yourself within the file where the JavaScript code is located and from there, in the console, call the command:
|
1
|
node jade_test.js |
Instead of the name jade_test.js, enter your arbitrary file name. Respectively, the one you used when you created the previously defined code. By executing this command, you will receive:
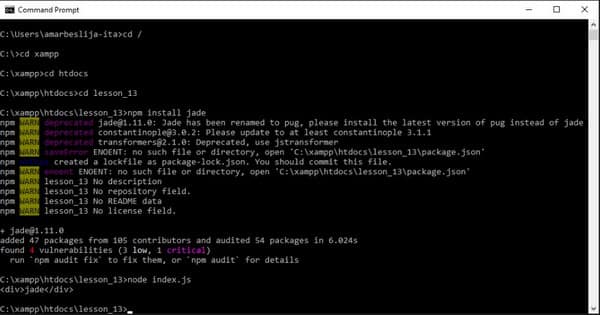
Image 13.5. Installing and testing Jade
There is no default or specific HTTP server within the Node.js platform. It is necessary to create a special server on the Node.js platform, which must be run. At the beginning of using the platform, it is necessary to call the appropriate module, which serves a certain page. Server activities generally include the http or https modules . We met the modules in the previous example. They are the basis for any kind of work with web applications. There is a whole set of predefined modules that are required for a web application to work. When the http module becomes available, we can create a server and run it to listen to client requests. Communication on the web has always been based on the exchange of messages between the client and the server. The customer can represent any person, in our case, the customer is the one who sends a certain request and waits for a response. It is the server that, based on the client’s request, generates a certain response. This response is sent back to the client. In the following example, we can see how a server is created.
We create the file: myFirstHTTPSever.js:
Exemplul 1: JavaScript : myFirstHTTPServer.js
|
1
2
3
4
5
6
7
8
9
10
|
var http = require('http');const PORT=8080; function handleRequest(request, response){ response.end('It Works!');}var server = http.createServer(handleRequest);server.listen(PORT, function(){ console.log("Server listening on: http://localhost:%s", PORT);}); |
First, we need to include the http module, in order to use its functions. We can do this by calling the require function, which “includes” the module passed in our file. The object that is returned by the method represents the instance of the module and with its help we can call all the methods of the given module. In the example, we called the object http .
After this, we’ll create the constant that represents the number of ports to listen on:
|
1
|
const PORT=8080; |
After this, we define the handler function, which will be able to handle the requests and react accordingly. This is the entry point to our server application.
Now we can create and run a server:
|
1
|
var server = http.createServer(handleRequest); |
Finally, we call the listen() method, to which we pass the port number on which the server will listen for client requests. Let’s start our application. We need to open the console and navigate to the location where our previously defined code file is located. When we have positioned ourselves within the file, we need to enter the following command in the console:
|
1
|
node myFirstHTTPServer.js |
With this we activate the server, that is, we execute the instructions in the file we generated. If you have successfully launched the server, you will receive:

Image 13.6. Testing the node.js HTTP server
With its help we started the server on our local computer and we can access it. Open your browser and enter http://localhost:8080/. The page will open with the following message:
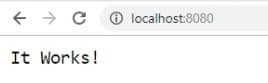
Image 13.7. The output in the browser
As we can see, the message that we generated earlier appears on the page. So I got the server response on port 8080.
Complete Node.js API documentation can be found at:
What JavaScript engine is Node.js based on?