
Vue components
Unit: 6 of 15
User environments of web applications can be summarized as a set of smaller units. Such smaller units, which make up the user environment of an application, are called components. Vue knows the concept of components, so the component system is one of the most important concepts in Vue, which allows the efficient creation of the presentation logic of web applications. This lesson will be dedicated to creating and using Vue components.
What are Vue Components?
Vue components are independent units that are part of the user environment of web applications. Therefore, web applications are often made up of certain elements or sections common to a large number of views or pages. For example, such sections may include navigation, a status bar, a header or a toolbar. These are sections that most web applications have and are best implemented as independent units, allowing them to be inserted wherever their presence is needed.
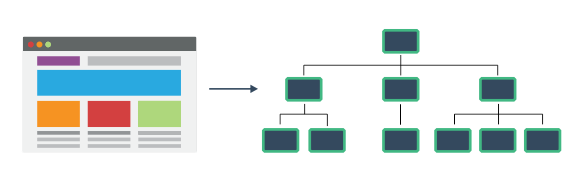
Image 6.1. The Vue component system
How to create Vue components?
Vue components are Vue instances that are created using the Vue.component() method :
|
1
2
3
|
Vue.component('my-component', { template: '<div>Hello from component.</div>'}) |
In this way, the first Vue component was created. You can see that the Vue.component() method accepts two parameters:
- the first parameter refers to the name of the component,
- the second parameter is the configuration object.
In the example, the configuration was done using only one property – a template. The template property is used to define the component template.
This way, we come to the first difference between Vue instance and Vue component. When creating the Vue component, the el property is not used, but the template is fully defined as the value of the special template property.
To display a component created in this way in the Vue application template, it is enough to use its name, which is defined after creation:
|
1
2
3
4
5
6
7
8
9
10
11
12
13
14
15
16
|
<div id="container"> <my-component></my-component></div><script src="vue.js"></script><script> Vue.component('my-component', { template: '<div>Hello from component.</div>' }) var vm = new Vue({ el: '#container' })</script> |
The component is placed inside the template by defining an HTML element whose tag name corresponds to the component name. When generating an HTML document, Vue will replace the <my-component></my-component> element with the content of this component, respectively with the div element with the content Hello from component , so that the effect in the web browser will be as in image 6.2.
Image 6.2. The text derived from the Vue component
| Note
Vue components can only be used within a Vue instance template. Therefore, in the example a Vue instance was created and an element with id container was defined for the root element of its template. Finally, this basically means that the created component must be found within the container element. If it were listed outside of such an element, Vue would not be able to display it. |
Components with their own data
As we already mentioned, Vue components are actually Vue instances created in a slightly different way. Both instances and components accept the configuration object, and the properties that can be used for configuration are almost identical. The only exception is the el property , which cannot be used when configuring components. All this means that, even within a Vue component, it is possible to define data using the data property:
|
1
2
3
4
5
6
7
8
9
10
11
12
13
14
15
16
17
18
19
20
21
|
<div id="container"> <my-component></my-component></div><script src="vue.js"></script><script> Vue.component('my-component', { data: function () { return { counter: 0 } }, template: '<div v-on:click="counter++">{{ counter }}: Hello from component.</div>' }) var vm = new Vue({ el: '#container' })</script> |
The example has now been modified in several ways. First, when you define a component, the data property is specified in the configuration object, which defines an object with the counter property and the value 0 as our component’s local data.
Now, the template has been partially modified. Added a subscription to the click event , whereby JavaScript logic is defined in a linear fashion, i.e. as a direct value of the v-on directive . By defined logic, it is said that each click on the div element of the component will increase the value of the counter variable by one.
Finally, the values of the counter variable were interpolated within the template, so that, finally, in this way the behavior illustrated by animation 6.1 was obtained.
![]()
Animation 6.1. Local data component
In the example shown, it is important to note that the data is not defined as it has been done so far within the Vue instance. The data, i.e. the value of the data variable , within the components is defined in the form of a function . The return value of such a function is the data that the components will use:
|
1
2
3
4
5
|
data: function () { return { counter: 0 }} |
Data in components must be defined in this way, so that each component has its own data instance. If the data is defined as an object, Vue specifies that, within components, the data must be defined as a function:
[Vue warn]: The “data” option should be a function that returns a per-instance value in component definitions.
All of this enables one of the core features of Vue components – reusability:
|
1
2
3
4
5
|
<div id="container"> <my-component></my-component> <my-component></my-component> <my-component></my-component></div> |
Now, within the Vue application template, 3 components of type my-component are created . Thus, the example illustrates the possibility of reusing Vue components ( a component can be used countless times ).
Since each component is an independent entity, each will have its own data instance (animation 6.2.).

Animation 6.2. Each Vue component has its own data instance
A Vue component can only be used once.
Passing data to components
In real circumstances, components that only hold local data have very little use value. Therefore, data is injected , most often, into components from the external environment.
To allow a component to obtain data, you must first register properties . This is done by using the props property in the object to configure the Vue component:
|
1
2
3
4
|
Vue.component('my-component', { props: ['name'], template: '<div>Hello {{ name }}.</div>'}) |
Now, when creating the component, the value of the props property is defined. This defines an attribute, called name. When such an attribute is populated with a value outside the component, it too automatically becomes an object property of the Vue component.
After defining the values of the props property , the basic way to pass data is to define it in the application template using a syntax that reminds us of the syntax for defining attributes:
|
1
2
3
4
5
6
7
8
9
10
11
12
13
14
15
16
17
18
19
|
<div id="container"> <my-component name="Ben"></my-component> <my-component name="John"></my-component> <my-component name="Tom"></my-component></div><script src="vue.js"></script><script> Vue.component('my-component', { props: ['name'], template: '<div>Hello {{ name }}.</div>' }) var vm = new Vue({ el: '#container' })</script> |
In this way, in the web browser a listing is obtained as in image 6.3.

Image 6.3. A Vue component used three times with different input parameters
However, in real-world conditions, the data will most often exist in the object attached to the data property of the Vue instance:
|
1
2
3
4
5
6
7
8
9
10
|
var vm = new Vue({ el: '#container', data: { users: [ { id: 1, name: "Ben" }, { id: 2, name: "John" }, { id: 3, name: "Tom" } ] }}) |
Data is now defined in the data property of the Vue instance as an array of objects, each object representing a person with id and name properties .
As I already said, in real circumstances, data is used, most often, in this form, and if we want to present it with the component that we created in the previous lines, we must use some directives that we have encountered in the previous lesson. For each object in the string in which persons are represented, a component must be created and the corresponding data (name properties) must be passed. This can be done as follows:
|
1
2
3
4
5
6
7
8
9
10
11
12
13
14
15
16
17
18
19
20
21
22
23
24
|
<div id="container"> <my-component v-for="user in users" v-bind:key="user.id" v-bind:name="user.name"></my-component></div><script src="vue.js"></script><script> Vue.component('my-component', { props: ['name'], template: '<div>Hello {{ name }}.</div>' }) var vm = new Vue({ el: '#container', data: { users: [ { id: 1, name: "Ben" }, { id: 2, name: "John" }, { id: 3, name: "Tom" } ] } })</script> |
The example illustrates the dynamic rendering of HTML elements using the v-for directive and our components, respectively user-defined components of type my-component. This approach is very useful when a certain set of data needs to be displayed in an HTML document, the amount of which is not known in advance.
| Defining keys while using the v-for directive
In the presented example, a special attribute – key – was used for the first time. This is an attribute that can be used to define a unique node identifier within a Vue template. This helps the Vue system to uniquely identify each node, which can be very useful in situations where there is a change in the DOM structure. Therefore, by default, Vue uses an algorithm that makes every effort to reduce moving, that is, destroying elements and recreating them. Therefore, it often happens that, in case of changes in the structure of the DOM, one element is used to create another element, in order to improve performance. In most situations, the default behavior is adequate, but when working with components, it is good to define the value of the special key attribute in combination with the v-for directive . |
Local and global components
Before we continue to familiarize ourselves with the other properties of components, it is important to say that components can be global or local. All components created so far in this lesson have been global.
Global components are those that are created using the Vue.component() method:
|
1
2
3
|
Vue.component('my-component-name', { // ... options ...}) |
Components created this way are available everywhere, which is why they are called global. They can be used anywhere in the Vue instance template, but also in any other component.
| Note
Global components can only be registered if the call to the Vue.component() method is made before the Vue instance is created. |
Local components are created a little differently, namely in a way that does not involve the use of the Vue.component() method. Local components are only defined using a setting object, which must be assigned to a variable:
|
1
2
3
|
const MyLocalComponent = { template: '<div>Hello from local component.</div>'} |
Here is an object assigned to the MyLocalComponent variable that will be used to create a local component. Unlike global components, local components must be explicitly included in the Vue instance or other components, using a special property called components :
|
1
2
3
4
5
6
7
8
9
10
11
12
13
14
15
16
17
18
19
|
<div id="container"> <my-local-component></my-local-component></div><script src="vue.js"></script><script> const MyLocalComponent = { template: '<div>Hello from local component.</div>' } var vm = new Vue({ el: '#container', components: { 'my-local-component': MyLocalComponent } })</script> |
The code shown illustrates a complete example of creating and including a local component within a Vue instance.
Component templates must have a root element
So far, we have shown that component templates are defined as the value of a template property. However, all the component templates created so far were very simple and consisted of a single HTML element. In practice, component templates generally consist of a number of elements. Then it is important to know that all elements must be grouped into a single root element.
Here is an example of a component whose template consists of a number of elements:
|
1
2
3
4
5
6
7
8
9
10
11
12
13
14
15
16
17
18
19
20
21
22
23
24
25
26
27
28
29
30
31
32
33
|
<div id="container"> <user-component v-bind:user="user"></user-component></div><script src="vue.js"></script><script> var data = { user: { name: "Ben Torrance", email: "ben@email.com", balance: 55353.93434 } }; Vue.component('user-component', { props: ['user'], template: ` <div class="user-container"> <h3>{{ user.name }}</h3> <p v-text='user.email'></p> <p v-text='user.balance'></p> </div> ` }) var vm = new Vue({ el: '#container', data: data })</script> |
| Template literals
The example presented illustrates a special functionality of the JavaScript language, which was introduced with the appearance of the ES2015 specification. These are template literals. This functionality, among other things, allows you to define string values on multiple lines, without having to use the plus (+) character to perform string concatenation. Therefore, in the example you can see that the component template is defined in multiple lines, without any concatenation character. All of these are enabled using special quotes for modifying string values - “. |
Listening to component events
In some situations you may need to listen for events that may occur on elements belonging to a component. Events can be listened to inside the components, but also outside them.
Listening to events in a component is done using the v-on directive in combination with the methods property , within which an event processing function can be defined:
|
1
2
3
4
5
6
7
8
9
10
11
12
13
14
|
Vue.component('user-component', { props: ['user'], template: `<div class="user-container"> <h3>{{ user.name }}</h3> <p v-text='user.email'></p> <p v-text='user.balance'></p> <button v-on:click="sayHello">Say Hello</button> </div>`, methods: { sayHello: function (event) { alert(`Hello ${this.user.name}`); } }}) |
Now another HTML element has been added to the component template. It is a button-type element, on which the subscription to a click- type event was performed . Using the v-on directive defines that a function called sayHello will be called during a click event . Such a function is defined within an object assigned to the methods property . This way, clicking on the button element displays a modal window with the message Hello Ben Torrance .
| Access to the instance of the component
Attention to the fact that the message generation example uses data that is sent to the component by the Vue instance and that is stored in the user property of the component. To get such data, the keyword this is used. This this keyword, anywhere within the component configuration object, points to an instance of the component. The only exception to such a rule is the use of Arrow functions . Therefore, it is recommended to avoid using Arrow functions within objects to configure Vue instances and components. |
In some situations, it may be useful to process component events outside of them. Such a thing can be done by emitting the event outside the component, which allows the event to be processed globally, i.e. in the parent component or within the Vue instance.
|
1
2
3
4
5
6
7
8
9
10
11
12
13
14
15
16
17
18
19
20
21
22
23
24
25
26
27
28
29
30
31
32
33
34
35
36
37
|
<div id="container"> <user-component v-bind:user="user" v-on:say-hello="sayHello"></user-component></div><script src="vue.js"></script><script> var data = { user: { name: "Ben Torrance", email: "ben@email.com", balance: 55353.93434 } }; Vue.component('user-component', { props: ['user'], template: `<div class="user-container"> <h3>{{ user.name }}</h3> <p v-text='user.email'></p> <p v-text='user.balance'></p> <button v-on:click="$emit('say-hello', user.name)">Say Hello</button> </div>` }) var vm = new Vue({ el: '#container', data: data, methods: { sayHello: function (name) { alert(`Hello ${name}`); } } })</script> |
The example has now been modified in several ways. To begin with, the method for processing the click event on the button located inside the component, has been moved to the Vue instance. It also now accepts an input parameter that defines a person’s name.
Within the component, the processing of the click event is no longer performed, but it is transmitted outside the component itself, which is achieved by calling a special method of the Vue library. This is the $emit() method.
| $emit() method
The $emit() method is used to produce an arbitrary event in the Vue component. Two parameters can be passed to this method: $emit( eventName, […args] ) The parameters have the following meanings:
Based on the presented parameters, it can be seen that the $emit() method allows the creation of completely arbitrary events that will be emitted from the components. Therefore, it is possible to define any name for the value of the eventName parameter. |
In the example shown, which illustrates emitting events from the component, the following was done:
- within the component template, a subscription was made to the click event using the v-on directive ,
- the value of the v-on directive is set to call the $emit() function , which, when the component’s button element is clicked, emits an event called say-hello ,
- to the say-hello event, the parameter referring to the user’s name is also added,
- the say-hello event is processed within the Vue instance by placing a v-on directive in the Vue application template on the user-component element , with a value indicating the name of the function that will process the say-hello event ,
- finally, when the user clicks the button element inside the component, the component emits a say-hello event, which ultimately results in the call to the sayHello() function, which is defined in the attached object to the methods properties of the Vue instance.
The slots
Previously, the basic way in which data can be passed to components is presented. This is an approach that involves using properties that are defined using the props property. The values of these properties are defined as attributes that are placed on components when they are integrated into the template.
Another way to allow components to pass data to be displayed within a template is to use slots. A slot is actually a special element that can be placed inside a component template and whose value will be filled with a text defined as content when integrating the component into the Vue instance template. The following example illustrates the use of slots:
|
1
2
3
4
5
6
7
8
9
10
11
12
13
14
15
16
17
18
19
20
21
22
23
24
25
26
|
<div id="container"> <info-box> This is message 1. </info-box> <info-box> This is message 2. </info-box></div><script src="vue.js"></script><script> Vue.component('info-box', { template: ` <div> <strong>Message:</strong> <slot></slot> </div> ` }) var vm = new Vue({ el: '#container' })</script> |
In the example, a Vue component called info-box has been created. A slot element is placed in its template. Such a component is included twice in the Vue instance template, where the content, which will fill the slot element, is defined as a content of the element representing the component in the template. All this will produce a result on the page as in image 6.4.

Image 6.4. Components whose content is partially defined using slots
Single-file components
The highlight of working with Vue components is the ability to define each component in a separate file. Such components are called single -file components .
Single-file components allow the entire code to be defined in a single file to define a single Vue component. This basically means that within one file it is possible to define a template, the styling and the JavaScript logic that defines the component.
Single-file Vue components are stored in files with the extension .vue . Therefore, the first step in the process of creating a single-file Vue component is to create an empty file with the extension .vue.
Here’s what one of the components from this lesson might look like when converted to a single-file component:
|
1
2
3
4
5
6
7
8
9
10
11
12
13
14
15
16
17
18
19
20
21
22
23
24
25
26
|
<template> <div class="user-container"> <h3>{{ user.name }}</h3> <p>{{ user.email }}</p> <p class="balance">{{ user.balance }}</p> </div></template><script> export default { name: "MyVueComponent", props: { user: Object } };</script><style scoped> h3 { text-decoration: underline; } .balance { font-style: italic; }</style> |
In the code that creates the first single-file Vue component, you can see three basic units:
- template element – this is a special element in which the component template is defined,
- script element – element within which the JavaScript code with which the component is configured is defined,
- style element – element for defining the styling that will refer to the HTML elements used to build the component.
By using single-file components, we enter the realm of advanced use of the Vue ecosystem and, in general, the realm of advanced front-end programming. Therefore, since the single-file component is located in a file with the .vue extension, web browsers cannot understand the content of these files. Therefore, several tools used to build code that can be understood by web browsers must be included in the development story. These are tools that are also called Build Tools . These allow all Vue components to be separated and transformed into clean HTML, CSS, and JavaScript code that web browsers will be able to understand.
Today, there are several popular build tools that can be used to develop Vue applications. First of all, these are the Browserify and Webpack tools , which were already mentioned in one of the previous lessons, when it was about the Node.js executable environment and the package manager, npm. However, we will not use such tools directly in the future, because the Vue ecosystem has a specialized tool, adapted to the development of Vue applications, which facilitates and summarizes the use of the mentioned tools. It is a Vue CLI, a command interface that provides a set of different tools that speed up and make programming in Vue easier.