
Replication
Unit: 23 of 24
Replication allows data synchronization between two or more servers running on the same or different machines. But, in production conditions, we are almost always talking about different machines.
Different database management systems perform replication differently, so we need to familiarize ourselves with how replication works on each database management system.
MySQL has support for the so-called master/slave replication system . From the name, we can easily conclude that the two main elements of this system are master and slave. Master exists as a primary repository, in which data can be read and written. This is the system responsible for all changes made to the data. The slave server or servers are used to replicate data from the master. Unlike the master server, the slave servers are only used for reading data.
We can easily conclude that each of these elements represents a single MySQL server. Thus, the master server can be only one, while the slave servers can be arbitrary, even unlimited, within the limits of the system’s possibilities.
Replication works like this: after a very short period of time, all changes made to the data on the master server are replicated on the slave servers.
Replication works even if different operating systems are installed on the participating computers.
Why do we use replication?
We have two main reasons why it is good to use replication, namely:
- security, and
- speed.
security
Thanks to replication, the database is accessible on several computers. If the slave computer stops working, the whole system will continue to work without any problems. When the slave computer resumes its activity, the synchronization that was not performed in the meantime will take place.
If the master computer shuts down, i.e. interrupts its activity, the data integrity is guaranteed by the slave computers. We can even configure the entire system so that slave computers take over the role of master in situations where it stops. But, in such situations, the entire system will be read-only, accessible only for reading.
In terms of security, we mention one more positive feature of replication, namely the easier backup of data . Thanks to replication, data is always up to date.
Speed
By using replication, higher speed can be achieved. Difficult queries are shared between several slave computers, while the master system is used exclusively for updating data. We must also mention the fact that, if we want to use such functionalities, our client program must prepare the queries ahead of time in order to execute them in an orderly manner.
After all this, we can conclude that the advantages of using replication are as follows:
- facilitating the activity of the components of large databases;
- data security/backup;
- data analysis;
- remote data distribution.
How does replication work?
Except for the MySQL cluster configuration , replication is a one-way, asynchronous process where data moves from the master server to the slave server(s).

Image 23.1. Replication
For replication to work, a binary log must be enabled on the master server. When all slave servers start listening to the master, they are at a common point in the log (each position in the log is marked with a number). While executing SQL commands on the master server (and in the master log), the position of the marker in the log changes. Periodically, the slave server checks the master log and compares it with the previous version. Everything that happened between the two checks is also executed on the slave, thus obtaining an exact mapping of the data.
In MySQL, replication can be activated in several ways: from regular SQL commands and MySQL console commands to the use of applications whose sole role is to handle replications.
Creating replication
| Note:
If you want to try, for example, the following statement, you need two MySQL servers. Install two MySQL servers on different computers or on the same computer. If you are using only one computer, make sure that the two server instances have different TCP/IP ports. In the example we will use a single computer and ports 3306 and 3307. In the video lesson you have a detailed tutorial on how replication works. |
In our example, we will define the simplest replication, namely the replication consisting of a master and a slave.
User creation
After establishing the purpose of replication (when we already know what will be the architecture of our application, how many servers it will have, what data will be taken into account), we must create the replication user. This is not a required step, and the user does not need to be created specifically for this purpose, but it is recommended for security reasons.
This user will represent the slave servers on the master server and therefore must have the REPLICATION SLAVE privilege. Let’s say it’s the user we created the replication for: rep, with password 123 :
|
1
|
GRANT REPLICATION SLAVE ON *.* TO 'rep'@'localhost' IDENTIFIED BY '123' |
Our user’s domain is localhost (as it is a sample), but a very rare case in practice (the slave servers will be on other computers).
Setting up a master replication system
After replication, users need to prepare the servers, primarily the master server. The minimum required for a server to participate in replication as a master is to have an id and a binary log.
This can be achieved through direct intervention on the my.ini file or using MySQL Workbench. Regardless of how we do this, the result will consist of the following two lines in the my.ini file:
|
1
2
|
log-bin=mysql-binserver-id=1 |
Through MySQL Workbench, we can do this in the following way: by default, the binary log for the MySQL server is not configured, so we need to define the file where it will be saved. To do this, we must first select the Options File option in the INSTANCE section:
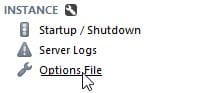
Image 23.2. Options File
After that, we need to find and check the bin-log option and define the name of the file where it will be stored:

Image 23.3. Enable binary logging
The name of the log is not important, as long as it conforms to the file conventions of the operating system.
All that remains is to see how to configure the server id needed for replication to work. We must select the GENERAL tab, where there is the server-id option :

Image 23.4. Configuring the server id number
The id must be an integer value, greater than zero, unique to each server in the replication.
After configuring these parameters (manually or through an application), we must restart the server.
Configuring the slave system
And the slave server needs some data: id (same as for the master server), authentication data for the master server (authentication for the replication_user user ), binary log and relay log. The slave server does not absolutely need the binary log, but the relay log does, because it contains all the differences between a master binary log and the data on the slave). The changes on the my.ini file are as follows:
|
1
2
3
4
5
6
7
|
server-id = 2log-bin = binlog-bin-index = log-binlog-error = errorrelay-log = relayrelay-log-info-file = relay-logrelay-log-index = relay-log-index |
After that, we need to run the following commands on the slave server:
|
1
2
3
4
5
6
7
|
CHANGE MASTER TOMASTER_HOST='localhost',MASTER_USER='replication_user',MASTER_PASSWORD='123',MASTER_PORT=3306,MASTER_LOG_FILE='myssql-bin.000003',MASTER_LOG_POS=120; |
MASTER_HOST refers to the host on which the master server resides. MASTER_USER is the username of the user we created on the master for replication needs. MASTER_PASSWORD refers to the password of the specified user. The master port of the server is defined by the MASTER_PORT setting.
The name of the log_file (MASTER_LOG_FILE) and its position (MASTER_LOG_POS) can be found if on the master server we run:
|
1
|
SHOW MASTER STATUS; |
Thus, we obtain the table in which we are interested in two columns: file and position.
| File | Position |
| myssql-bin.000003′ | 120 |
Table 23.1. File and position
We will use this data to set values for MASTER_LOG_FILE and MASTER_LOG_POS in the command above.
The described procedure is sufficient for replication if it is a completely “clean” server, on which there is still no data. Restarting the slave server will also automatically enable replication.
If we want to start replication with existing data (which is much more likely), we need to do one more thing. We need to tell the slave server at which position it should start tracking changes in the log, which is most easily done in the following way:
First, we need to download the master database script using the mysqldump console tool (located in the MySQL bin folder):
|
1
|
mysqldump -uroot --master-data my_database > backup.sql |
- – uroot is the username (-u is the username switch, and root is the username; since we haven’t assigned a password to root, we don’t need an additional -p switch);
- –master-data is a very important option, which contains the name of the master log file and the position of the marker. In the script this option will produce the following line:
|
1
|
CHANGE MASTER TO MASTER_LOG_FILE= 'mysql-bin.000001', MASTER_LOG_POS=548; |
- my_database is the database name. As a test, I put only my_database in this script, but we could also put all the databases (–all-databases);
- sql specifies the name and location of the file where the script will be located. Since we didn’t mention the folder name, this file will end up in the folder where the mysqldump application is (bin folder).
After executing this command, if everything is as it should be, the backup.sql file will be created . Next, we need this file on the slave server. Once the file is on the server, we activate its script with the following console command:
|
1
|
mysql -uroot < backup.sql |
or in any other way. For example, by enabling the script from MySQL Workbench.
After this step, we just need to access the slave server and activate the command:
|
1
|
SLAVE START; |
From this moment, all changes on the master server will also be reflected on the slave.
Replication on the slave server is stopped with the following command:
|
1
|
STOP SLAVE; |