Content management
Unit: 5 of 13
As we know, WordPress is a content management system (Content Management System); Consequently, the two most important admin pages are Post and Page, where we manage all posts and pages.
Both parts are similar, and the differences are conditioned by the differences between the post and page entries. In the central part is the table with all the posts, that is, all the pages with columns indicating the name, author, date of publication, etc. Certain columns can be sorted by clicking on the column name.
As when editing the category, moving the mouse cursor over the row of a certain type of post/page entry, one by one, on the left side, the options Edit and , which allow modification, quick modification, deletion, respectively revision.ViewTrash, Quick edit,
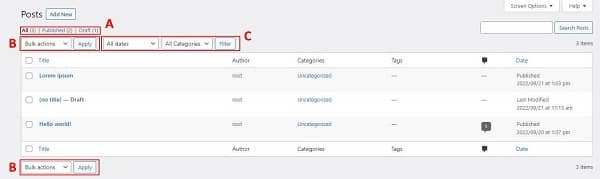
Image 5.1. Posts administration page
In the image above, some additional options are marked. Marked with A in the image are the filter options. With their help we can display only a certain group of entries, defined by status (for example, only drafts (draft)). In this part, the Trash option will also be displayed, in case we deleted a certain entry. Directly below this are options for bulk operations (marked B in the image) and additional filtering options (marked C in the image).
| Note
When we delete a certain post or page, it is not deleted forever, but first goes into the Trash category. From there, we can delete it permanently (Delete Permanently) or we can restore it (Restore). Regarding this, it is important to note one detail. Namely, as long as the post or page is inside the Trash category, it will not appear on the site, but will still occupy the URL, i.e. the permalink. It may happen that, for example, we create My Page. WordPress will create the link structure as: /my-page. If we delete that page, it will move to Trash; if we try to create a new page with the same name, the new page can also be called My Page, but the path will automatically be /my-page-2. As long as the old page exists (even in the Trash), we cannot give the new one the same path. If we want this, we must first permanently delete the first one. |
| Additional Information
Don’t forget that even with these administration pages you can access the dialog Screen Options and set the display mode. |
Faster and mass operations
Sometimes it is useful to perform a quick operation on the page or post. In this case, we can choose Quick edit, which we have already mentioned, and make changes directly on the Pages/Posts administration page, without we need to open it completely. Most of the options in the input settings are also displayed here.
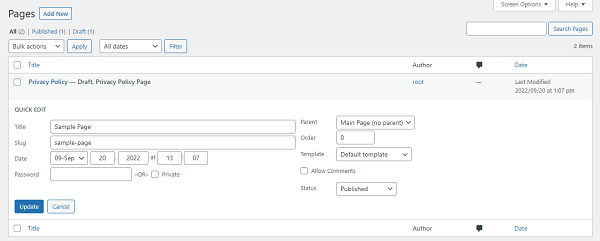
Image 5.2. Quick change of Page entry
However, in some situations it is necessary to change several entries simultaneously. Whether it is because it is necessary to change the category for multiple posts, or because it is necessary to add a certain tag, or it is necessary to update the template for multiple page entries, etc., it is tedious and time consuming to do it individual. Because of this, WordPress allowed mass changes. It is enough to select (tick) several post/page entries using the checkbox on the left and select the desired operation from the drop-down menu up/down (B in image 5.1.). Choosing the Edit option, we open an additional dialog similar to the Quick edit option, except that it will refer to all selected entries. By selecting the Trash option, we can move all selected entries to the trash.
Media Grid
While the options, respectively the pages Posts and Pages, are almost identical, the option Media is quite different.
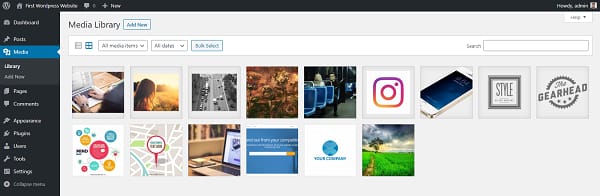
Image 5.3. Mediate
In this image are displayed all the images and other files that we have entered on our pages. By default, images are displayed with a thumbnail screen (eng. thumbnails), while other files are displayed with corresponding icons. This display mode is called Media Grid. Very often, for these images and other files, the term Attachment is used.
If we still want to show the media entries as we do with the post or page entries, we can also choose such a mode of operation, using the icons directly under the title of the administration page, as we see in the following image.
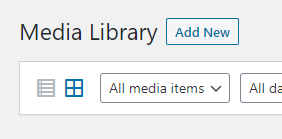
Image 5.4. Grid or list display
If we switch to List view, the administration page of Media Library will look almost identical to the admin page Post/Pages. However, in this way we can quickly and easily see in one place all the additional information of several files (in the columns of the table).
To the right of these options are the filter options, as well as the Bulk select options, which allow multiple files to be selected for deletion. . It is enough to start the option mentioned above, with one click we mark the desired ones and select the deletion with the help of Delete selected. Be careful not to delete the image or files to be used on the site. If you do this, the pages they are on will try to show them, but errors will occur.
By clicking on a certain image, we get an additional dialog of the image (or other type of file), which is called Attachment Details , which we see in the image below.
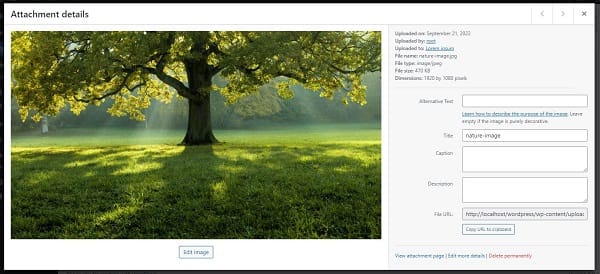
Image 5.5. The Attachment details dialog
We note that this dialog is very similar to the dialog when inserting images into the editor when creating or modifying entries page or post. However, there are some differences. In the upper right corner, in addition to the options to close this additional dialog, there are also the options previous and next , with the help of which we can move through files, without having to close the dialog box.
According to the basic information about the image that shows the file name, the image type, there is the information about the path on which the image is located, in the URL field. This path cannot be changed (but it can be useful if we want to access the file via FTP access or to link the image directly).FTP a>
Below are the fields we can modify.
- Title – title, name of the image; it does not change the name of the file, but the information about the site.
- Caption – the text that is (usually) displayed below the image. Most themes feature this text directly below the image. In some themes, a frame appears around the image and the text caption. In other topics, it does not appear at all.
- Other text – the alternative text that is displayed if the image, for any reason, has not been loaded.
- Description – image description. Themes generally do not display it to the user, the site visitor, directly on the image, but it will probably be displayed on the attachment page. It can also be useful in admin pages, for organization.
We can modify this information here. Images will be associated and will appear on each subsequent image input as well as on attachment pages (which we’ll talk more about shortly).
However, on pages or posts where the image has already been inserted, this information will not be changed. Also, this information can be adjusted later, on a specific page, if necessary.
Immediately below is the information about the user who originally posted the image (file). It will probably show Uploaded to, which marks which post or page entry is the actual image originally set.
Below, at the end of these options, there are also the following links:
- View attachment page – presents the Attachment page, the so-called attachments page that is created automatically.
- Edit more details – presents a new page for modifying the image (file). Contains the same options, but displayed in detail and with more elements.
- Delete Permanently – permanently deletes the image (file): does not move it to the trash, but permanently deletes it immediately. This option should be used with caution.
On the left side, just below the image, is the Edit image option, which runs built-in image editing features such as rotation, size change. This can be useful for quick and easy change, but still, for these corrections it is recommended to use tools like Adobe Photoshop.
Link between files – attach
Although an image can be used on several different pages, it is primarily linked to only one of them. It is usually linked directly to the page or post where it was first entered. If uploaded via Media Library, it will not be linked anywhere.
We can see if the image is linked somewhere and with which post or page entry if we open Media Library, but we display List view.
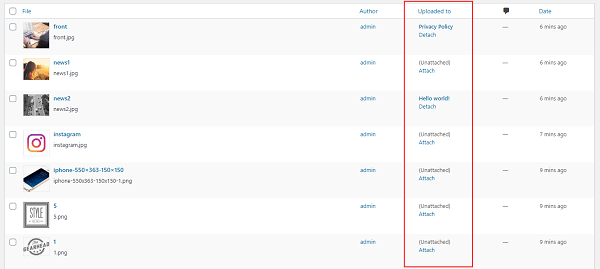
Image 5.6. Attachment – option uploaded to
From the same column we can link a specific image (attach) with a special post or page entry or unlink ( detach), in case we want to link it with another. This will not affect the display of the image on a particular page. Whether the image is linked or not, it will show if placed in the editor.
Why are we tying it up? We use this in situations where we want to display all the images associated with the page in the form of a gallery, etc.
Attachment page
When we insert a certain image into the WordPress site, it automatically receives the Attachment page, which is similar to regular page entries, except that the content of this page consists only of that image. We remind you that the basic types of content in the WordPress environment are Post, Page and Attachment page.
This actually means that, for example, if we create a page entry and place 10 images in it and save it, it will actually create a page and 10 entries in attachment page. Of course, attachment pages will not be displayed with other page entries. What is their role? We can use them, for example, when we present a larger image in relation to what is displayed on the post or page. We can also create a gallery, using them in a certain way.
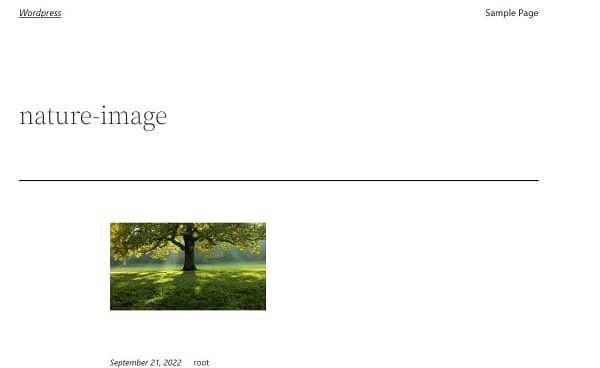
Image 5.7. Presentation of the Attachment page
Keep in mind that the options Previous Image and Next Image are presented in the image above. All images (files) that are linked will also be displayed here.
In the video material that accompanies this lesson, we will go through an example using the attachment page, where we will explain them in more detail.
By default settings: